
How To Make A Planter From Sleepers?
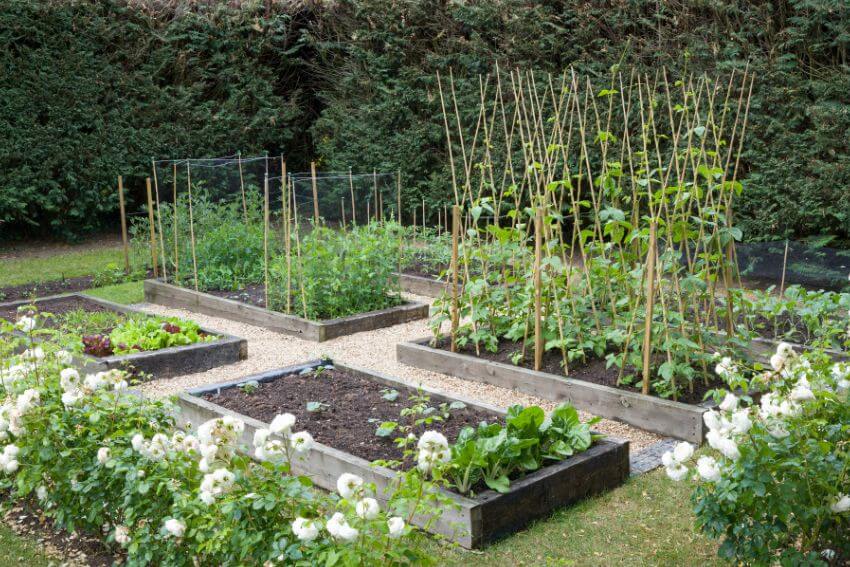
Greetings, my fellow gardening aficionados! 🌱 Today, I’m thrilled to delve into a fantastic project that will not only elevate the aesthetics of your garden but also provide a practical space for your cherished plants to thrive – crafting a planter from sleepers. If you’ve ever pondered how to turn reclaimed or new wooden sleepers into a stunning planter, you’re in for a treat. This DIY venture is not just a creative outlet but a rewarding way to enhance your garden’s visual appeal. So, don your gardening gloves and join me in this comprehensive guide to creating the perfect sleeper planter!
Table of Contents
Why Opt for Sleepers in Your Planter?
Before we roll up our sleeves and dive into the nitty-gritty of building a sleeper planter, let’s pause for a moment to appreciate why sleepers are an exceptional choice for this project:
- Durability: Wooden sleepers are known for their robustness and ability to withstand the test of time, ensuring your planter becomes a long-lasting fixture in your garden.
- Aesthetic Allure: Sleepers exude a timeless and rustic charm, making them an inherently pleasing addition to any garden landscape.
- Versatility: Sleepers offer remarkable versatility. You can fashion them into various planter shapes and sizes to seamlessly integrate with your garden’s design.
- Customization: The natural wood finish of sleepers provides ample room for customization. You can choose to stain them, paint them in a color that complements your garden’s theme, or let them weather naturally for a charming, rustic look.
Now that we’re well-acquainted with the perks of using sleepers, let’s embark on your sleeper planter project with these step-by-step instructions.
Materials You’ll Need
Before you begin your sleeper planter project, it’s essential to gather the necessary materials. Here’s what you’ll need:
- Wooden Sleepers: Select new or reclaimed sleepers in the dimensions that suit your planter design.
- Screws: Opt for rust-resistant screws that can securely hold the sleeper pieces together.
- Drill and Screwdriver Bits: A cordless drill equipped with appropriate screwdriver bits will significantly simplify the assembly process.
- Saw: A saw is essential for cutting sleepers to your desired lengths and angles.
- Landscape Fabric: You’ll use this to line the inside of the planter, preventing soil from escaping.
- Geotextile Membrane: While optional, it’s recommended for added protection against weeds.
- Soil: High-quality potting mix or garden soil for your plants.
- Plants: Choose the plants you want to grace your planter with.
Step 1: Planning Your Sleeper Planter
- Design: Begin by deciding on the dimensions and shape of your planter. Whether you prefer a rectangular, square, or tiered design, the choice is yours. Allow your creativity to flow freely.
- Site Selection: Choose a suitable location for your sleeper planter. Consider factors like sunlight exposure, drainage, and how it fits into the overall aesthetics of your garden.
Step 2: Preparing the Sleepers
- Measure and Cut: Measure the sleepers and mark them for the desired lengths. Use a saw to make precise cuts. If you wish to create angles or unique shapes, plan the cuts accordingly.
Step 3: Assembling Your Sleeper Planter
- Creating the Frame: Assemble the cut sleeper pieces into a frame, forming the structure of your planter. Use screws to secure the corners, ensuring a sturdy and stable foundation.
Step 4: Lining Your Planter
- Adding Landscape Fabric: Line the interior of the planter with landscape fabric. This serves two purposes – it prevents soil from escaping while allowing excess water to drain freely.
- Optional Geotextile Membrane: For extra weed protection, consider adding a layer of geotextile membrane beneath the landscape fabric. This will further deter weeds from infiltrating your planter.
Step 5: Filling Your Planter with Soil
- Fill ‘Er Up: Add your chosen potting mix or garden soil to the planter. Leave enough space at the top for your selected plants.
Step 6: Planting Your Garden in the Sleeper Planter
- Selecting Your Plants: Choose plants that are well-suited for the planter’s location and align with your garden’s aesthetics. Arrange them within the planter, allowing sufficient space for growth and spreading.
Step 7: Maintenance of Your Sleeper Planter
- Watering: Planter beds tend to dry out faster than traditional garden beds, so ensure your plants receive adequate water. Regular watering is essential for the well-being of your plants.
- Fertilizing: Depending on the types of plants you’ve chosen, fertilize them as needed to keep them healthy and thriving.
- Pruning and Deadheading: Regularly prune and deadhead your plants to maintain their shape and encourage healthy growth.
- Staining or Painting (Optional): If desired, you can stain or paint your sleeper planter. This not only adds a protective layer to the wood but also allows you to customize its appearance to match your garden’s theme.
In Conclusion
Congratulations, my gardening comrades! You’ve successfully brought to life a beautiful sleeper planter that not only enhances the allure of your garden but also provides a nurturing haven for your cherished plants. This DIY project is a testament to your creativity and passion for gardening, and it’s sure to be a focal point of your outdoor sanctuary.
As you watch your planter thrive and your plants flourish within its wooden embrace, you’ll find immense satisfaction in knowing that you’ve crafted this garden masterpiece with your own two hands. So, sit back, relax, and relish the beauty that your sleeper planter brings to your garden – a testament to your love for the craft.
Share This Story, Choose Your Platform!



Latest News To Your Inbox
Subscribe to hear about our latest blog posts, competitions and special offers.
