
Growing Microgreens on Rockwool – Elevate Your Indoor Gardening Game!
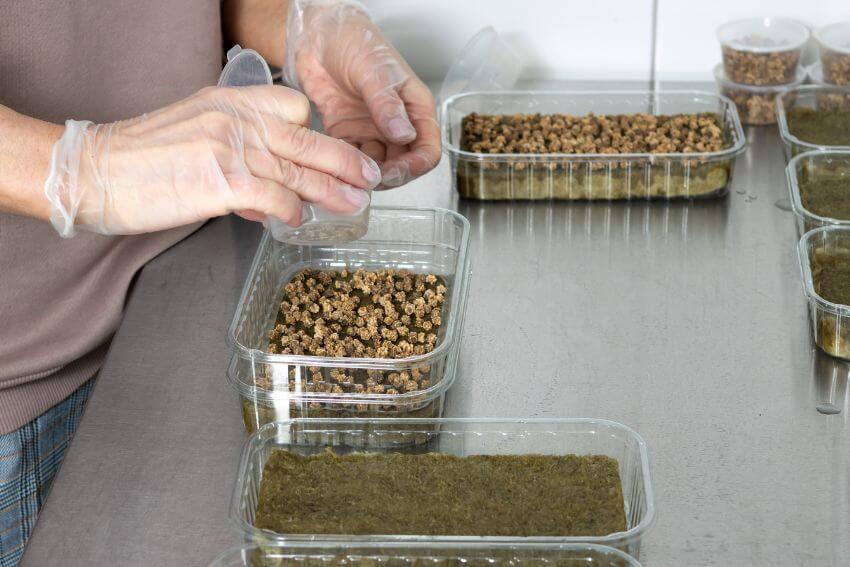
Hello, fellow plant enthusiasts and aspiring indoor gardeners! Today, we’re about to embark on a thrilling journey into the world of microgreens, those tiny powerhouses of flavor and nutrition. But wait, we’re not stopping there! We’re taking it up a notch by exploring the wonders of growing microgreens on rockwool. If you’re ready to infuse your dishes with bursts of color, taste, and vitality, then you’re in for a treat. So, roll up your sleeves and join me as we dive into the exciting realm of microgreens and rockwool cultivation.
Table of Contents
Why Microgreens on Rockwool? The Greens Revolution
Before we dig our hands into the rockwool, let’s understand why growing microgreens on this fantastic medium is creating a buzz among gardening enthusiasts:
- Lightning-Fast Harvests: Microgreens are all about quick results. Within just a few weeks, you’ll be enjoying your first harvest of these miniature greens.
- Nutrient Absorption Nirvana: Rockwool is like a nutrient buffet for microgreens. Its exceptional water retention and air circulation properties create an optimal environment for nutrient absorption, resulting in vibrant growth and enhanced flavor profiles.
- Indoor Gardening Delight: Whether you’re a city dweller with limited outdoor space or simply want to enjoy fresh greens all year round, microgreens on rockwool are your ticket to indoor gardening success.
Getting Started: Microgreens and Rockwool 101
Before we dive headfirst into the microgreen-rockwool synergy, let’s get acquainted with the stars of the show:
Introducing Microgreens
Microgreens are the young, tender shoots of vegetables and herbs. They are harvested at the cotyledon or first true leaf stage, bursting with concentrated flavors and nutrients.
Rockwool: The Unsung Hero of Growing Mediums
Rockwool is a mineral-based growing medium made from spun rock fibers. Its versatility and effectiveness in hydroponic and indoor gardening make it a popular choice among gardeners.
The Microgreen Magic: Selecting the Right Varieties
Before we start planting, let’s choose the microgreen varieties that will grace our rockwool beds:
A Palette of Microgreen Varieties
Explore the world of microgreens with varieties like sunflower, pea shoots, radish, broccoli, arugula, and basil. Each brings its own unique flavor, color, and texture to your culinary creations.
Sourcing Seeds with Care
Invest in high-quality, organic microgreen seeds from reputable suppliers. This is a small but crucial step that ensures your journey to a bountiful harvest starts off on the right foot.
Preparing Your Rockwool Bed for Microgreens
With seeds in hand and enthusiasm in our hearts, it’s time to prepare the perfect rockwool bed for your microgreens:
Cutting Rockwool with Precision
Trim your rockwool slabs into smaller cubes or sheets that fit your growing trays. These cubes will serve as the foundation for your tiny green oasis.
Getting Soaked and Ready
Submerge the rockwool cubes in pH-balanced water for a few hours before planting. This pre-soaking helps flush out excess minerals and creates a hospitable environment for seed germination.
Planting and Nurturing Your Microgreens on Rockwool
With your rockwool beds ready, it’s time to dive into the exciting process of planting and nurturing your microgreens:
Sowing the Seeds of Delight
Evenly distribute a thin layer of seeds across the surface of the rockwool cubes. Don’t worry about crowding; microgreens grow close together and complement each other’s growth.
Covering Up and Waiting
Gently cover the seeds with a thin layer of additional rockwool or vermiculite. Mist the seeds with water and cover the trays with plastic to create a mini greenhouse that promotes germination.
Creating the Right Environment
Place your trays in a well-lit area with indirect sunlight or make use of full-spectrum grow lights. Maintain high humidity levels by misting the trays occasionally.
The Journey of Microgreens: Growth and Care
As our microgreens stretch toward the light, they need our care and attention to thrive:
Unveiling and Uncovering
Once your microgreens sprout and develop their first true leaves, it’s time to remove the plastic cover. This allows for proper air circulation and prevents mold growth.
Watering with Love
Water your microgreens gently using a spray bottle or a gentle stream of water. Keep the rockwool consistently moist but be cautious not to overwater and create waterlogged conditions.
Harvesting and Savoring Your Homegrown Microgreens
The culmination of your efforts is finally here – it’s time to harvest and relish your homegrown microgreens:
Harvesting with Precision
Using clean scissors, snip the microgreens just above the rockwool surface. Aim to harvest when the leaves are fully developed, typically within 1 to 3 weeks.
Delighting in the Bounty
Incorporate your freshly harvested microgreens into a variety of dishes, from salads to sandwiches, wraps, and beyond. Their vibrant colors and intense flavors will transform your meals into culinary masterpieces!
Final Thoughts: Sow, Grow, and Savor with Microgreens on Rockwool
Embarking on the journey of growing microgreens on rockwool is like crafting art on a small canvas. The joy of watching these tender shoots flourish, knowing that you nurtured them every step of the way, is an experience that bridges the gap between gardening and gastronomy.
So, my fellow garden enthusiasts, let’s embrace the microgreens revolution, set up our rockwool beds, and embark on a flavorful adventure that celebrates nature’s treasures in miniature form.
Share This Story, Choose Your Platform!



Latest News To Your Inbox
Subscribe to hear about our latest blog posts, competitions and special offers.
